How to Identify and Assess a Roof Leak: A Step-by-Step Guide
Identifying a roof leak can often feel like searching for a needle in a haystack. Begin your assessment by inspecting the interior of your home for signs of water damage. Look for discolored patches on ceilings and walls, which can indicate the point of entry for water. Utilize a reliable source like HGTV's guide on finding roof leaks to understand the common areas where leaks may occur, such as around chimneys, vents, and skylights. Once you locate visible water damage, mark the spot and head up to your attic or roof to search for the leak's source.
Once on the roof, conduct a thorough visual inspection. Look for missing or damaged shingles, cracked flashing, or any foreign objects that may obstruct proper drainage. Use a garden hose to simulate rainfall—start at the lowest point of the roof and work your way up, watching for any leaks that may appear inside the home. It’s advisable to consult the National Roofing Contractors Association for further techniques on locating and diagnosing roof leaks effectively. Should your inspection reveal damage, it's crucial to act swiftly to prevent further issues and protect your investment.
Essential Tools and Materials for Your DIY Roof Repair
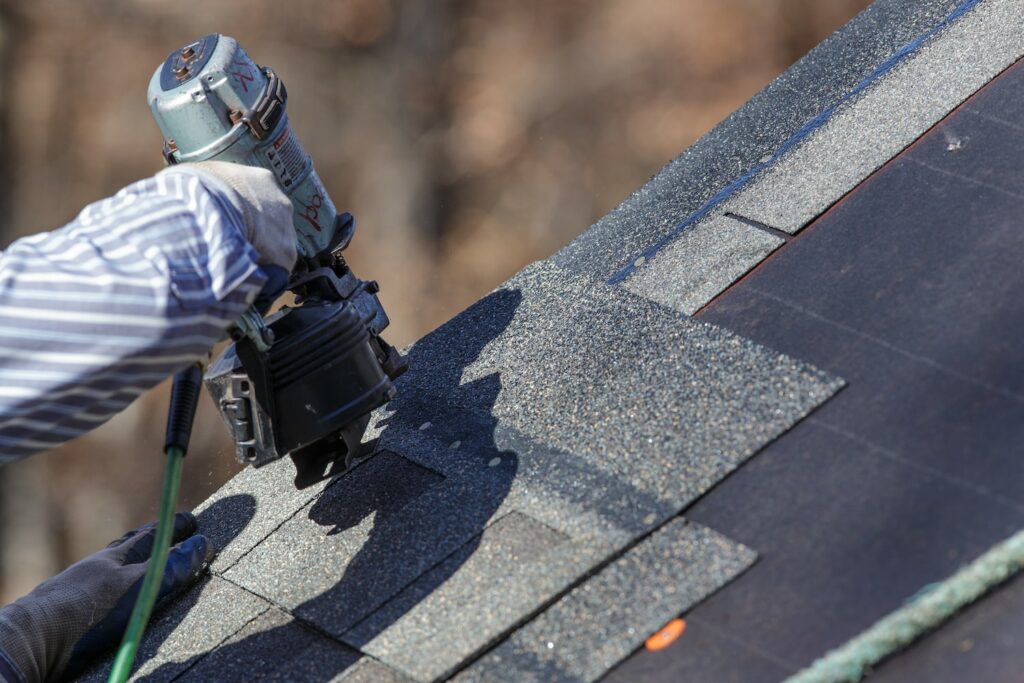
When undertaking a DIY roof repair, having the right tools and materials at your disposal is crucial for a successful outcome. Some of the essential tools include:
- Ladder: Ensure it is sturdy and long enough to safely reach your roof.
- Utility Knife: This is vital for cutting roofing materials with precision.
- Hammer or Nail Gun: Necessary for driving in nails when securing roofing shingles.
- Caulking Gun: Useful for applying roof sealants to prevent leaks.
- Safety Gear: Don’t overlook the importance of safety glasses and a hard hat.
For more detailed safety tips, you can visit Know Your Roof.
In addition to tools, you will need specific materials for a DIY roof repair. These include:
- Roofing Shingles: Choose quality shingles that match or complement your existing roofing.
- Roof Sealant: This helps to seal any cracks and prevent future leaks.
- Underlayment: A protective layer that adds an extra barrier against water damage.
- Flashing: Essential for directing water away from joints and seams.
For more information on selecting roofing materials, refer to Roofing Materials Guide.
What to Do When Your Roof Starts Leaking: Common Questions Answered
When you discover that your roof has sprung a leak, the first step is to remain calm and assess the situation. Identifying the source of the leak is critical; check areas around chimneys, vents, and skylights where leaks are commonly found. Use a flashlight to inspect your attic for signs of water damage, such as stained wood or puddles. If you have a flat roof, be sure to check for any pooling water. Additionally, if the leak is substantial, consider relocating any valuables and covering furniture with plastic sheeting to prevent water damage.
After you have assessed the leak, it's essential to act quickly. If you can safely access the roof, cover the leak with a tarp to prevent further water intrusion until a permanent fix can be implemented. It's advisable to call a professional roofing contractor to inspect the damage further. They can provide a detailed assessment and recommend the best course of action. For more information on repairing roof leaks, visit HomeAdvisor for expert guidance and tips.